Menu
DB9S.com
  • Home
  • Products
    • Aston Martin Headlight Upgrades
      • Aston Martin DB7 Headlight Upgrade
      • Custom Headlight Lens Etching
      • Aston Martin Headlight Upgrade DIY Bi-LED
      • Aston Martin Headlight Bulb Comparison
    • Aston Martin Custom Glass Switches
    • DB9 Bonnet bump stop support
  • Modifications and Upgrades
    • Lights
      • Aston Martin Headlight Upgrades
      • DB9 Headlight Upgrade Installation Guide
      • Aston Martin DIY Headlight Upgrade Installation
      • Aston Martin Headlight Upgrade DIY Bi-LED
      • Aston Martin Headlight Bulb Comparison
      • Aston Martin LHD RHD Conversion (Lighting)
      • Aston Martin DBS DRL
      • Sequential lights
      • DB9 Clear Rear lights
    • Engine, Inlet & Exhaust
      • Aston Martin DB9 Modified Exhaust
      • Upgraded Aston Martin V12 Exhaust
      • Aston Martin 3 way switchable Exhaust Valve
      • DB9 Air Box Delete
      • Aston Martin DBS Inlet Manifold Upgrade
    • Chassis, Suspension and Brakes
      • Aston Martin DB9 Upgraded Brakes
      • Aston Martin DB9 Polyurethane Bushes upgrade
      • DB9 Volante rear anti-roll bar
      • DB9 Volante Chassis Stiffening
      • DBS Anti roll bar upgrade for DB9
      • DB9S Wheels and Tyres
    • Interior
      • Aston Martin Custom Glass Switches
      • Aston Martin DB9 Dimming Rear View Mirror
      • Aston Martin Alloy Seat Controls
      • Upgraded DB9 Dashboard
      • Ambient Lighting
      • DB9 Modified Steering Wheel
      • DB9 Carpet Finisher
      • Aston Martin DBS/DB9 Android Auto
      • DB9 armrest upgrade
      • Later Memory Seats
      • Aston Martin DB9 Bespoke Luggage
      • Updated Aston Martin Sunvisors
    • Exterior
      • Aston Martin DB9 Rear Window Control
      • DB9S Carbon Edition
      • Aston Martin DB9 Windscreen Wipers
      • Aston Martin Engine Plaque
      • Aston Martin Magnetic Charging Port
      • Aston Martin illuminated Doorhandles
    • Upgraded Aston Martin Headlights
    • DB9, DBS or DB9S
      • Evolution of my DB9S
      • DB9, DBS or DB9S
      • DB9S modified Bootlid
      • DBS Front Bumper
      • Rear bumper and Diffuser
      • Sills
  • Manuals and Brochures
  • Maintenance
  • Blog
  • Gallery
  • Contact Us
DB9S.com
DB9 Headlight Upgrade Installation Guide

DB9 Headlight Upgrade Installation Guide

Posted on August 31, 2026October 20, 2026 by Paul

Aston Martin DB9 Headlight Upgrade Installation Guide, A basic pictorial guide to installing DB9S Bi-LED upgraded headlights in an Aston Martin DB9 or DBS. These instructions show just the upgrade process, not removing the headlights from the car.

Tools needed

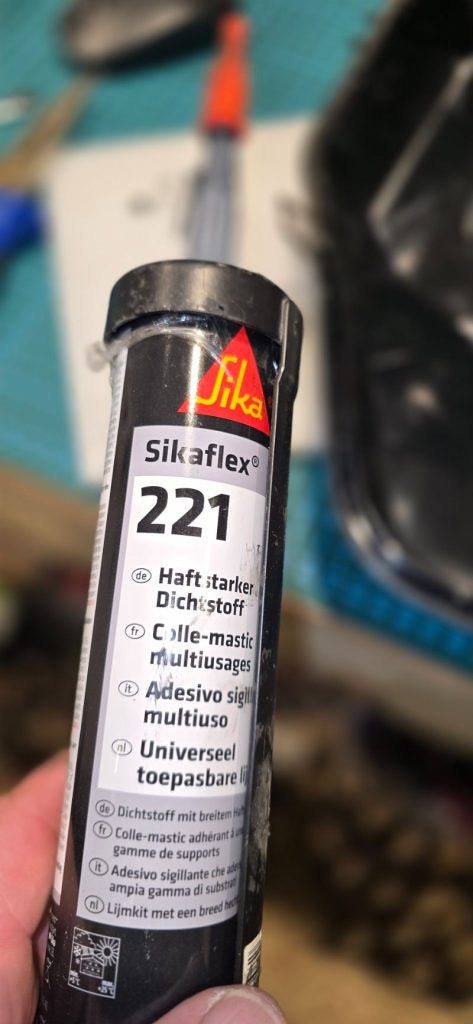
Tools needed are a hot air gun (or large oven), large broad flat screwdriver, sharp knife, ideally spreader pliers, small flat bade screwdriver, 5.5mm socket and black Sikaflex 221 sealant.
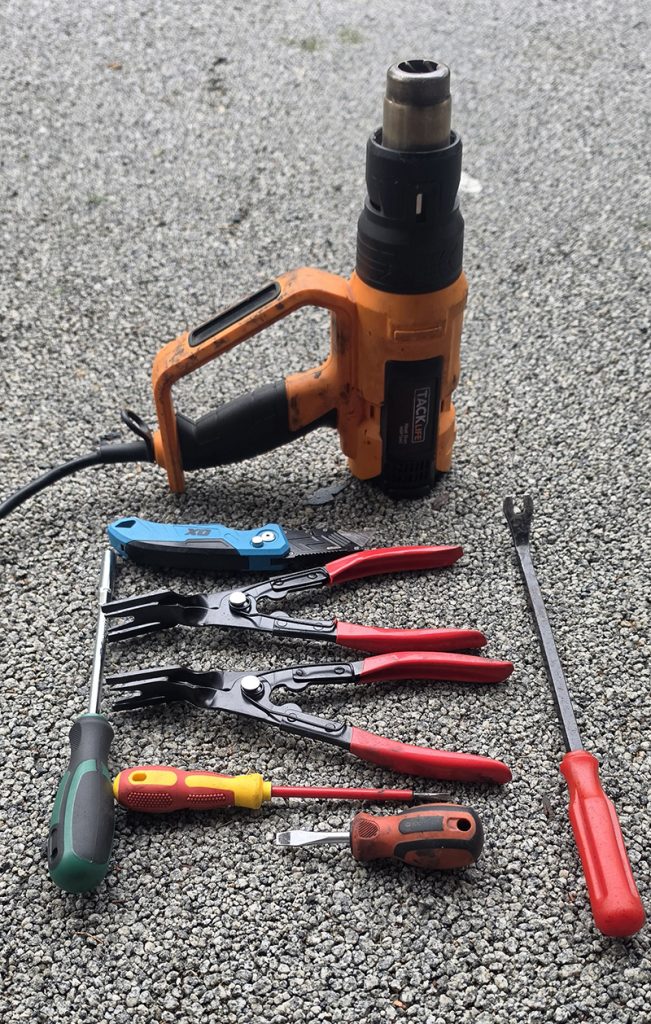
DB9 Headlight upgrade tools
db9 headlight sealant

Remove the rear of the housing

DB9 headlight
DB9 headlight

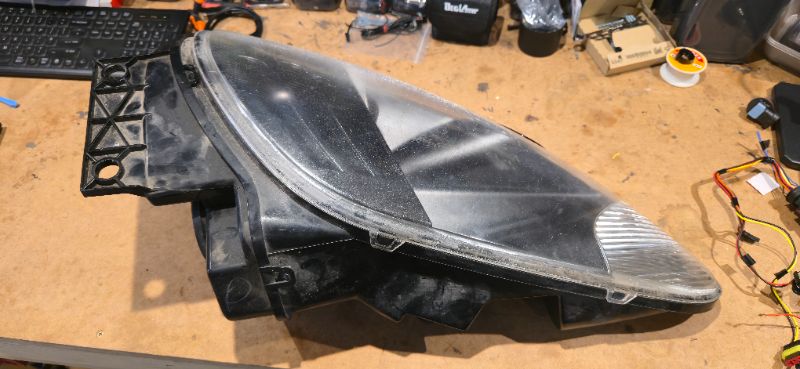
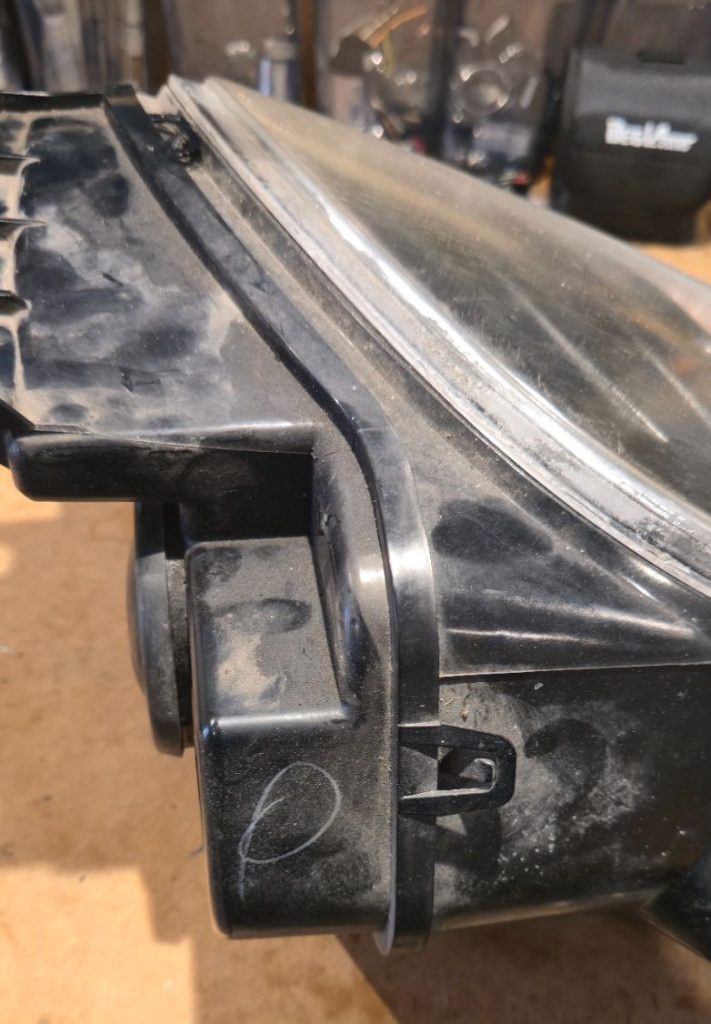
As can be seen the DB9/DBS headlight is not manufactured in one piece and both the lens cover and the rear can be removed, to upgrade the module only the rear part needs to be separated.
DB9 headlight rear
DB9 headlight rear
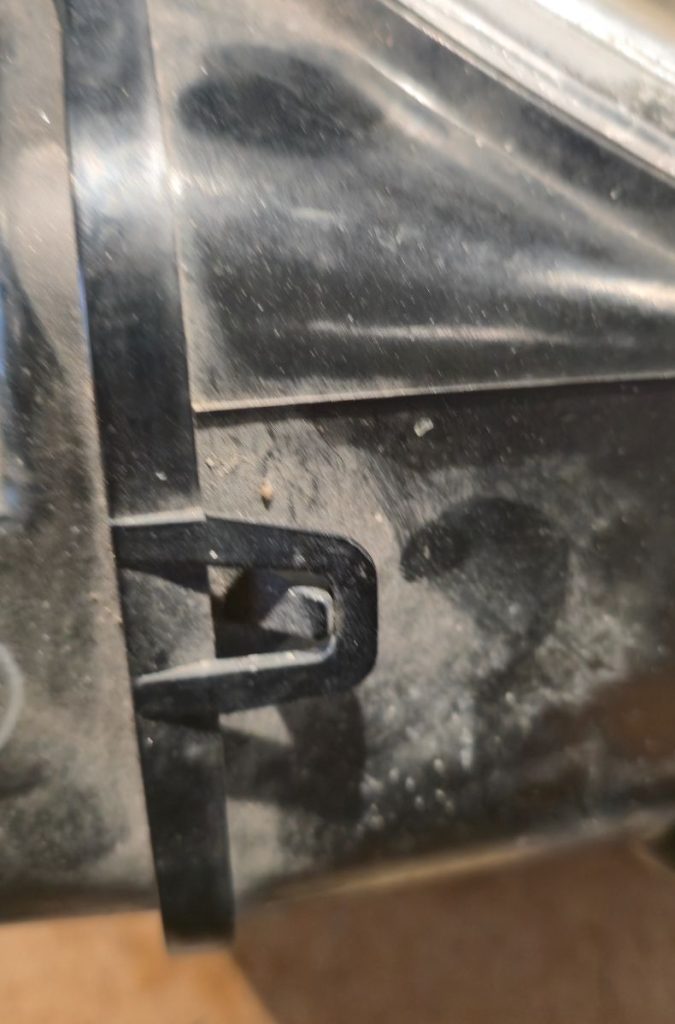
DB9 headlight clips
DB9 headlight clips

Gently heat the 4 clips so they can be levered off the retaining tab. Then run a sharp knife, Stanley knife, through the sealant to help break the seal.
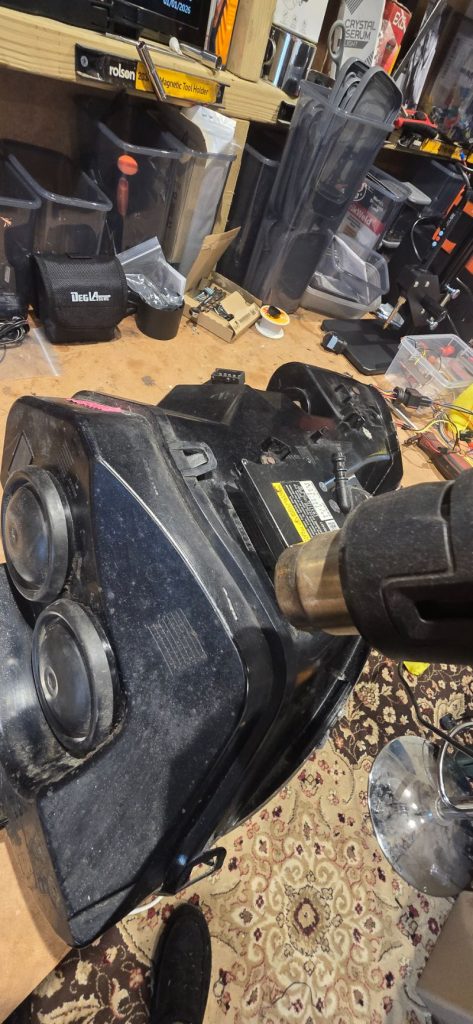
DB9 headlight rear heating

Using the heat gun gently heat the join between the two parts, starting with the underside near the HID ballast. Don’t hold the heat gun in one place but move it back and forth. Then using the large screwdriver gently lever between the ballast and the edge of the rear section of the housing, once it starts to open up then insert the separating pliers and whilst still heating work your way around the joint but don’t pull it too far away as the adjuster are still connected.
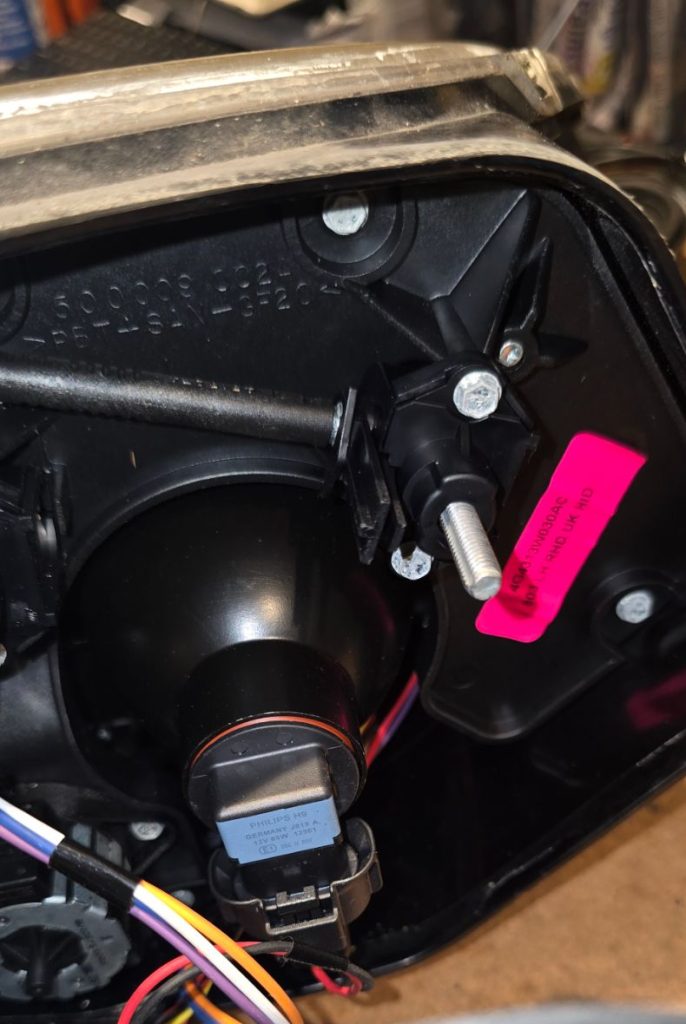
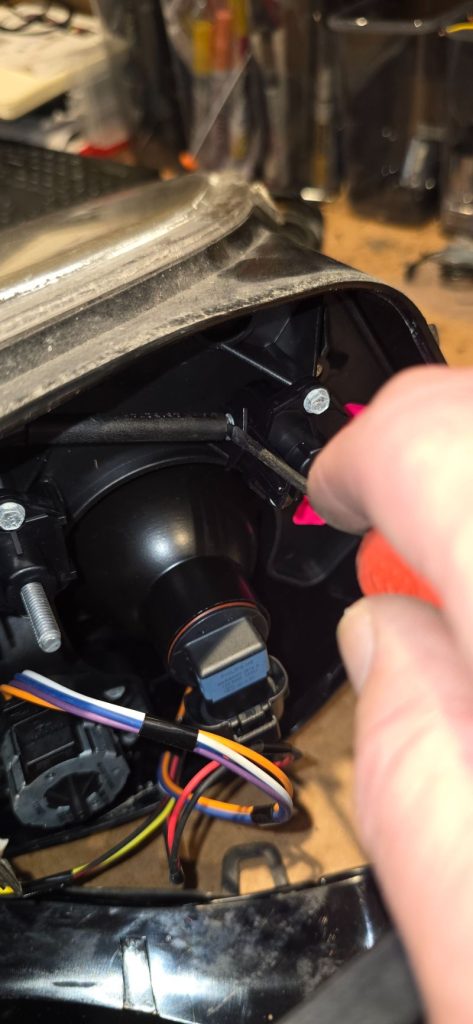
DB9 headlight adjusters

db9 headlight adjuster

Use the small flat screwdriver to gently lever the two adjuster cables away from the adjuster on the bracket. and then remove the rear part of the housing.
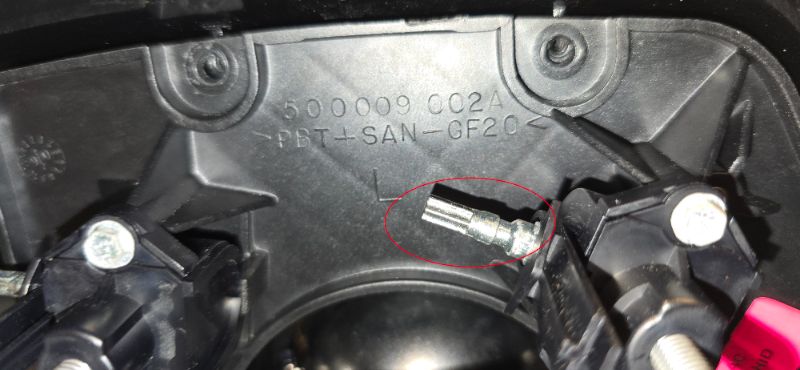
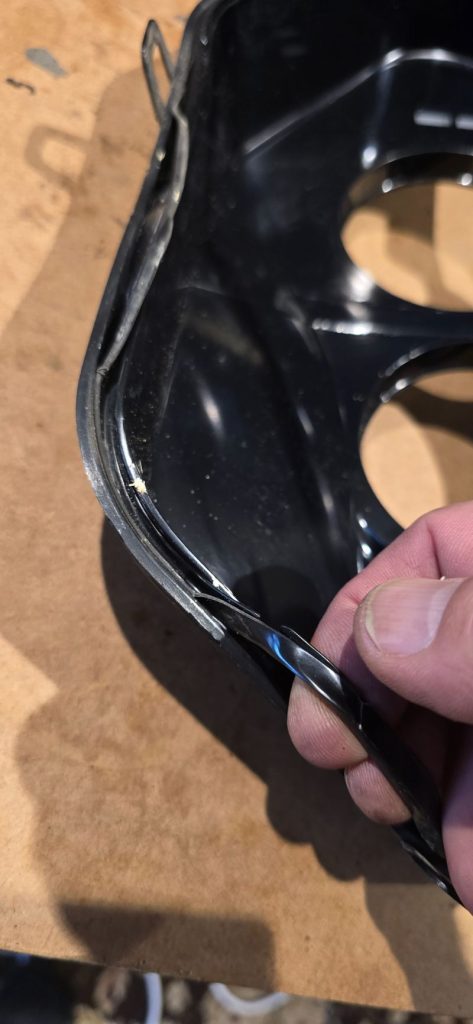
db9 headlight adjuster without cable
DB9 headlight rear sealant removal

remove the excess old sealant from the rear part of the housing, it may come out easily or may need some heat and a small screwdriver to remove it.

Remove the original projectors
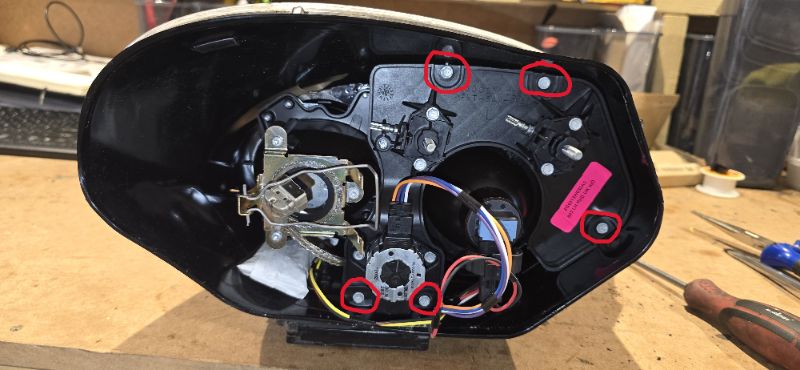
DB9 headlight rear bracket

Inside the rear of the DB9/DBS headlight (HID bulb already removed) with the screws shown in red, but remove the connectors first., the connector to the HID dipped beam, the main beam and the auto levelling motor.
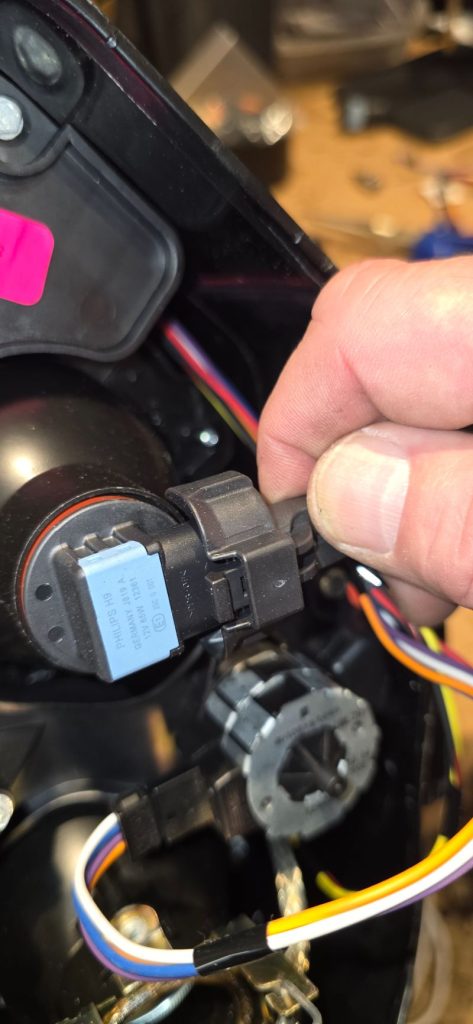
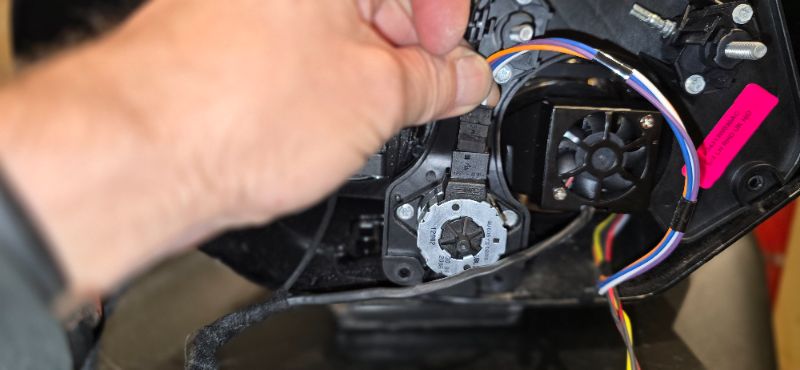
db9 headlight connector main beam
DB9 headlight levelling connector
DB9 headlight rear bracket

Remove the five screws marked, using a 5.5mm socket and then withdraw the bracket and projectors.
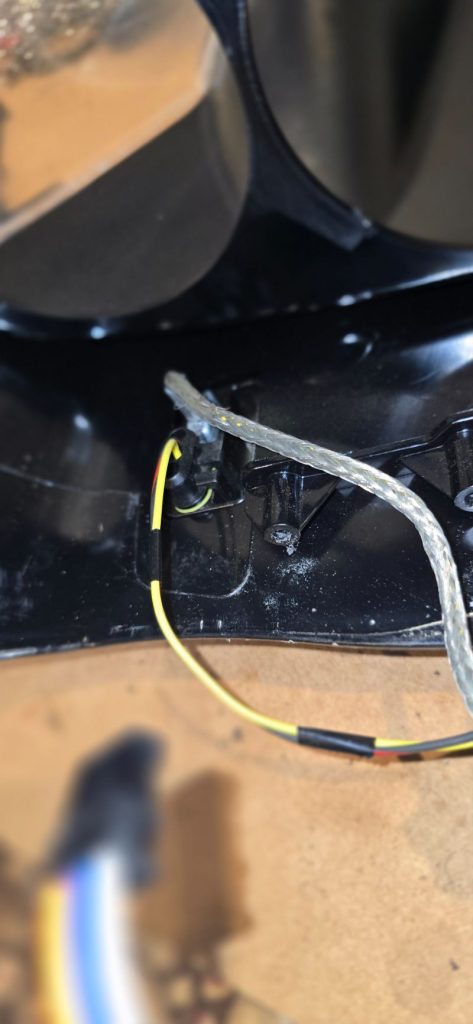
DB9 Headlight HID connectors

The two connectors to the headlight ballast can now be disconnected. The loose cable from the ballast to the bulb can be discarded.
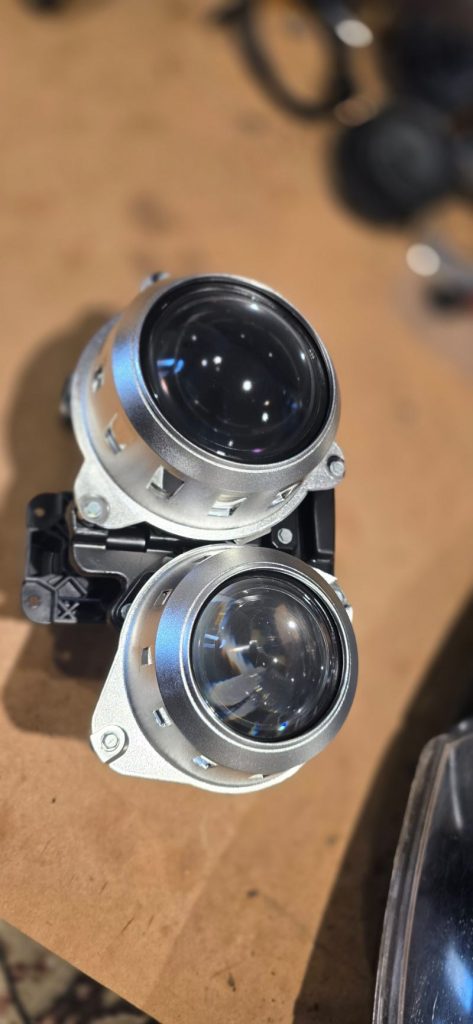
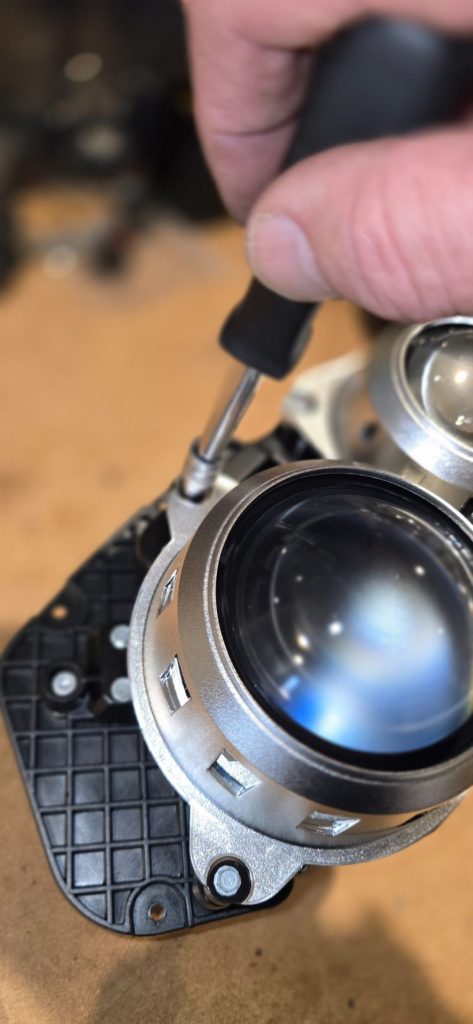
DB9 headlight original projectors
DB9 headlight bezel removal

Remove the projector bezels using the same 5.5mm socket.
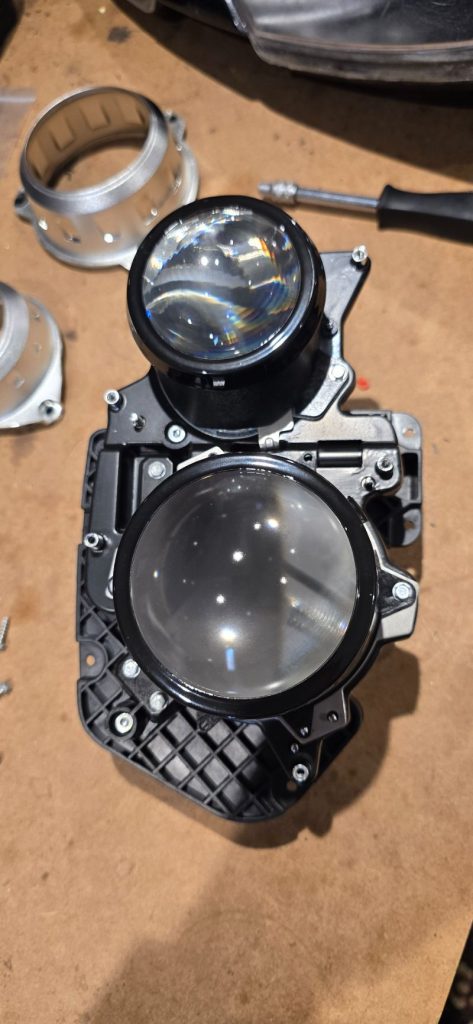
db9 headlight bezels removed

With the bezels removed we can now access the 4 screws holding the projector to the main bracket, again 5.5mm, remove these.
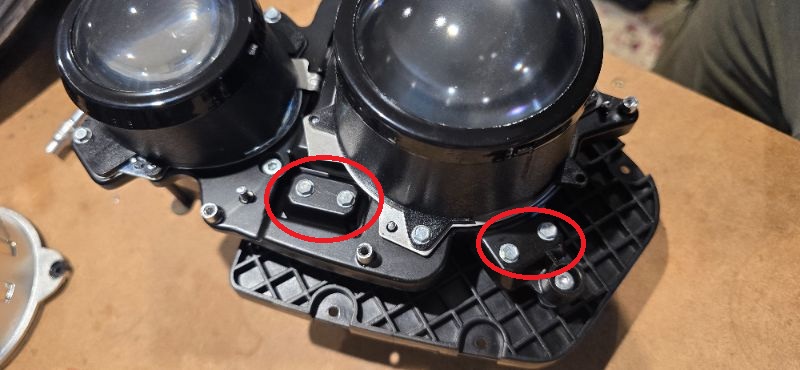
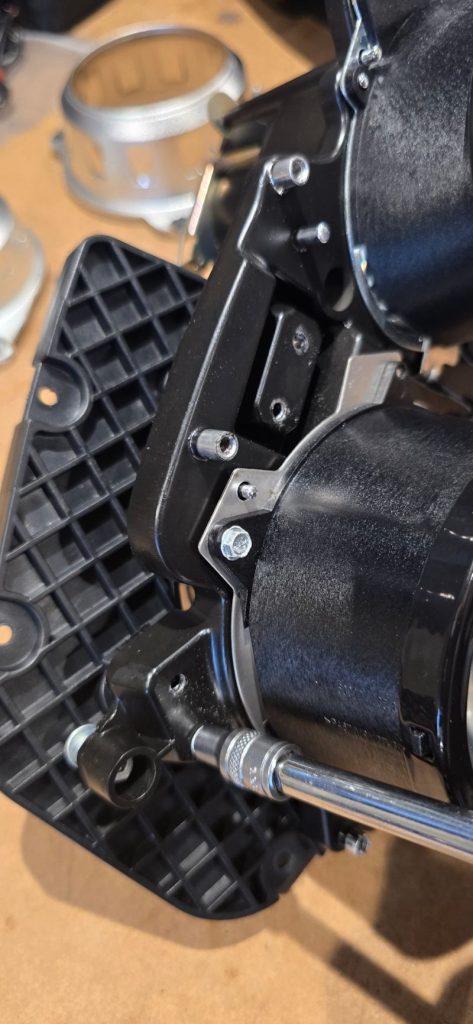
DB9 Headlight bracket removal
DB9 Headlight bracket screws
db9 headlight bracket separation
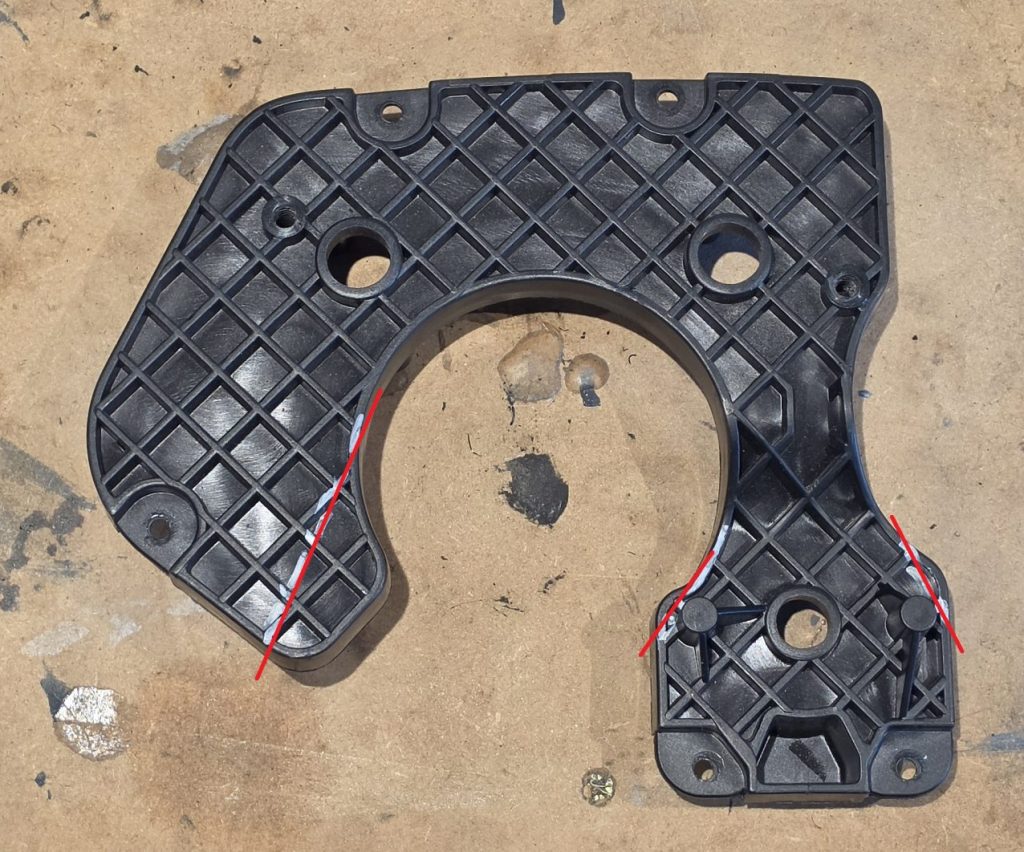
DB9 bracket modification

To allow the full range of adjustability, the bracket needs some small modifications, cut the lines marked in red with a hacksaw, ultrasonic knife, dremel or small angle grinder. This will allow the projectors to move through the entire arc of adjustment.

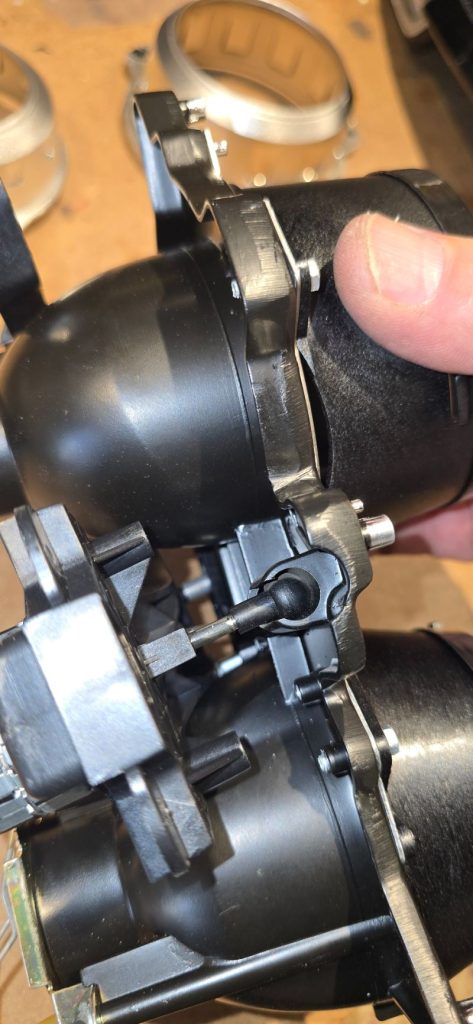
Remove the projector bracket from the projectors by sliding the levelling connector out the bottom of the module.
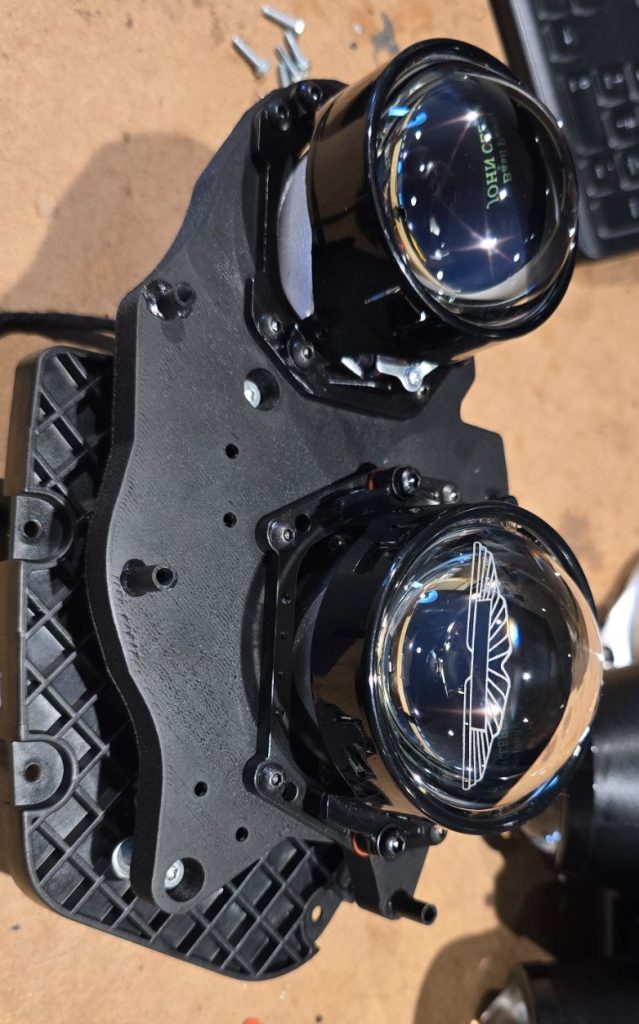
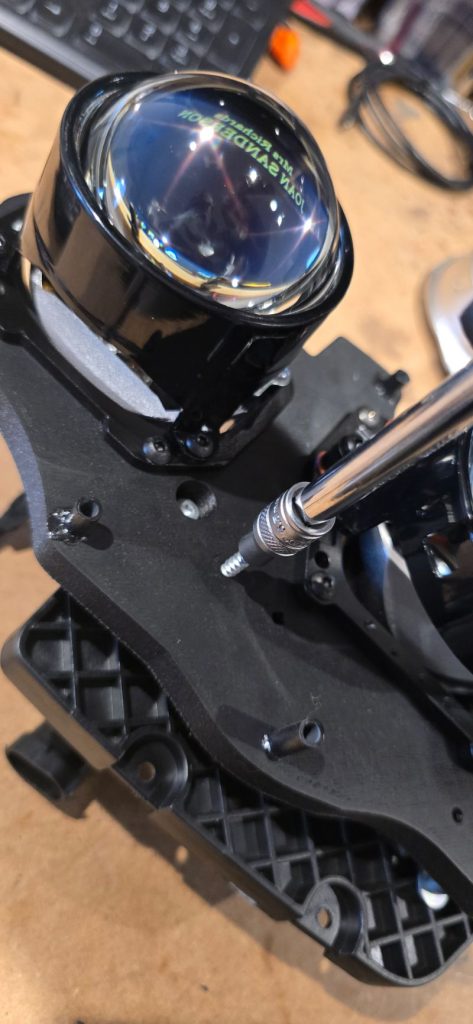
db9 headlight bracket replacement
db9 bracket installation

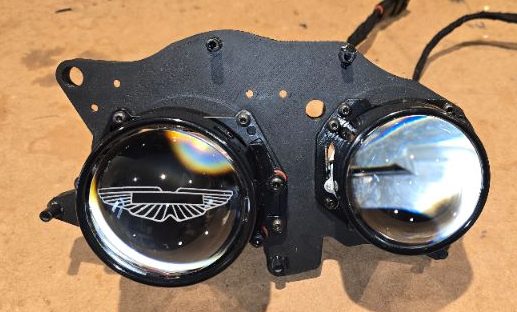
Install the new module by reversing the previous process, slide in the levelling ball (quite tight) and then swivel the bracket over and tighten the 4 screws up.
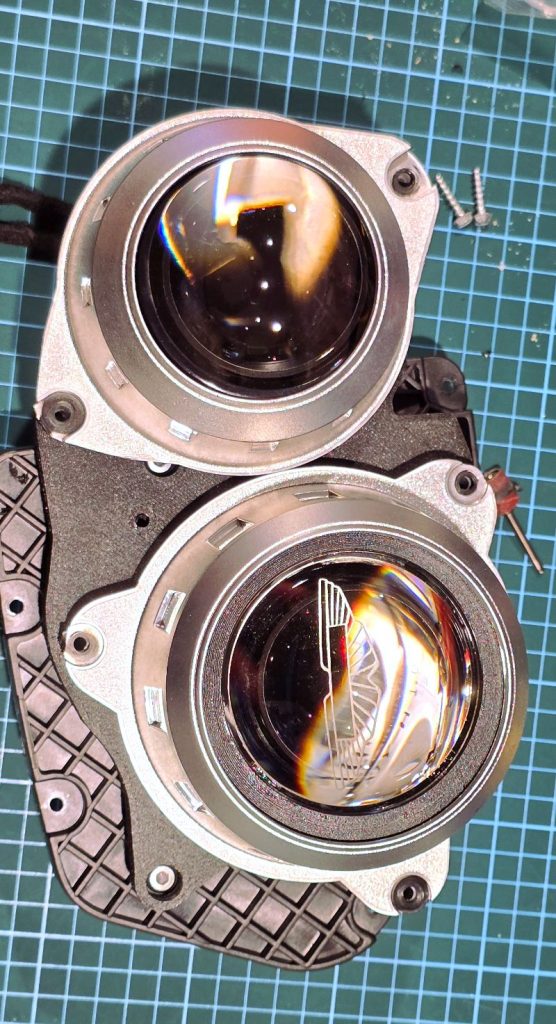
db9 headlight bezels reattached
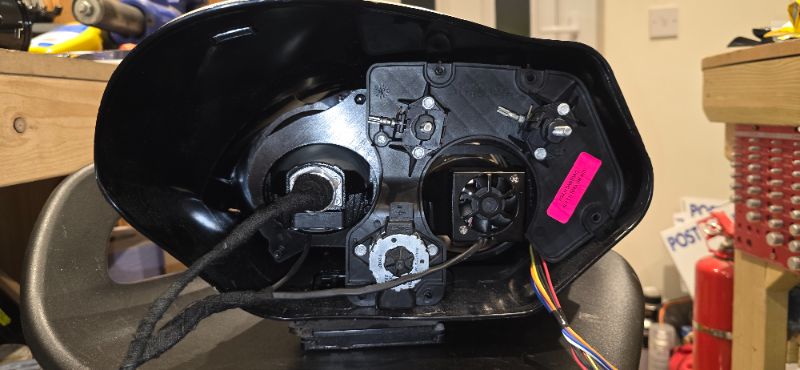
DB9 headlight module reinstalled

reinstall the headlight module and bracket in the headlight housing, tighten the 5 screws as before.
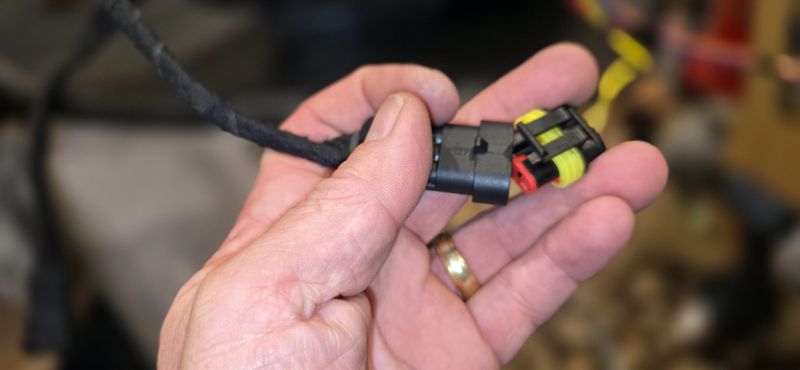
db9 headlight reconnection

reconnect the wiring, main beam, dipped beam and auto levelling.

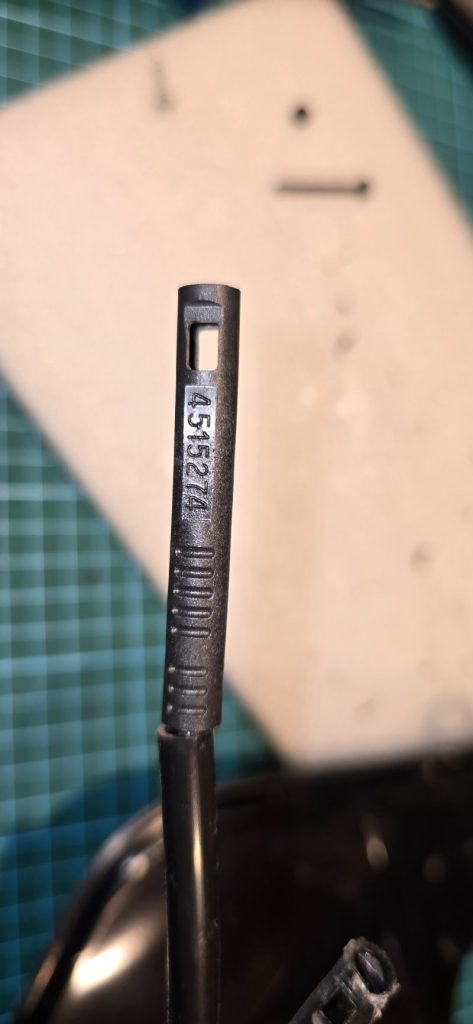
the next stage can get messy so have some latex gloves, install the Sikaflex 221 sealant into the groove of the rear part of the headlight housing then reinstall the cable adjusters
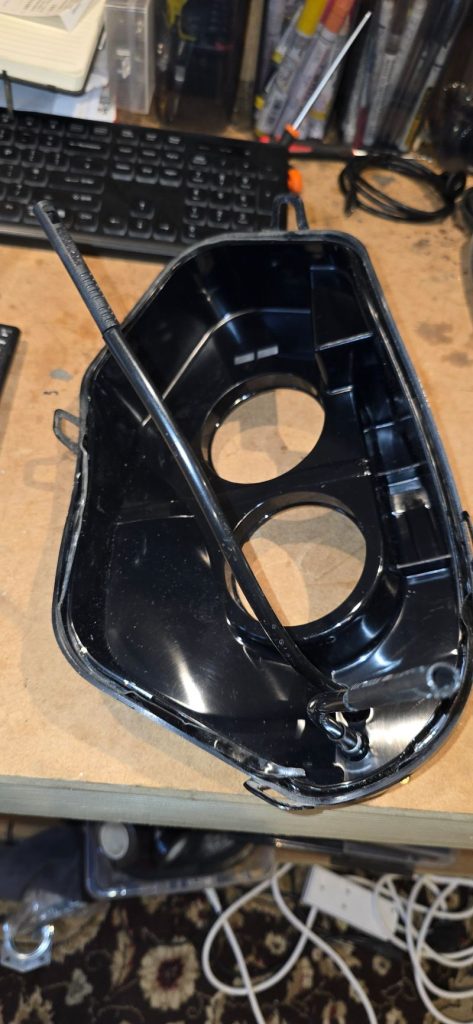
db9 headlight rear housing
db9 headlight manual adjuster

refit the cable headlight adjusters and then close the rear of the headlight up, ensuring that its is a snug fit all round and the clips are engaged, if any clips are broken use masking tape to hold in place and leave for 24 hours for the sealant to set.

Leave a Reply Cancel reply

Your email address will not be published. Required fields are marked *

©2022 DB9S.com