Menu
DB9S.com
  • Home
  • DB9, DBS or DB9S
    • Evolution of my DB9S
    • DB9, DBS or DB9S
    • DB9S modified Bootlid
    • DBS Front Bumper
    • Rear bumper and Diffuser
    • Sills
  • Modifications
    • Aston Martin DB9 Modified Exhaust
    • Upgraded Aston Martin Headlights
    • Aston Martin 3 way switchable Exhaust Valve
    • Aston Martin DB9 Upgraded Brakes
    • DB9 Air Box Delete
    • DB9S Carbon Edition
    • Aston Martin Headlight Bulb Comparison
    • Ambient Lighting
    • Aston Martin Alloy Seat Controls
    • DB9 Bonnet bump stop support
    • Aston Martin DB9 Polyurethane Bushes upgrade
    • DB9 Modified Steering Wheel
    • DB9 Volante rear anti-roll bar
    • DB9 Volante Chassis Stiffening
    • DBS Anti roll bar upgrade for DB9
    • Aston Martin DBS Inlet Manifold Upgrade
    • Aston Martin DBS DRL
    • Sequential lights
    • DB9 Carpet Finisher
    • Upgraded Aston Martin V12 Exhaust
    • Aston Martin Engine Plaque
    • Aston Martin DBS/DB9 Android Auto
    • Aston Martin Magnetic Charging Port
  • Updates
    • Aston Martin DB9 Updates
    • DB9 armrest upgrade
    • DB9 Clear Rear lights
    • Aston Martin Custom Glass Switches
    • Upgraded DB9 Dashboard
    • Aston Martin DB9 Dimming Rear View Mirror
    • Aston Martin Alloy Seat Controls
    • Aston Martin illuminated Doorhandles
    • Later Memory Seats
    • Updated Aston Martin Sunvisors
    • Aston Martin DB9 Rear Window Control
    • DB9S Wheels and Tyres
    • Aston Martin DB9 Windscreen Wipers
    • Aston Martin DB9 Bespoke Luggage
  • Maintenance
  • Aston Martin Services, Headlight Upgrades and Custom Glass Switches
    • Aston Martin Headlight Upgrades
    • Aston Martin Headlight Upgrade DIY Bi-LED
    • Aston Martin Custom Glass Switches
  • Aston Martin Manuals and Brochures
  • Blog
  • Gallery
DB9S.com
db9 2008+ wiring diagrams

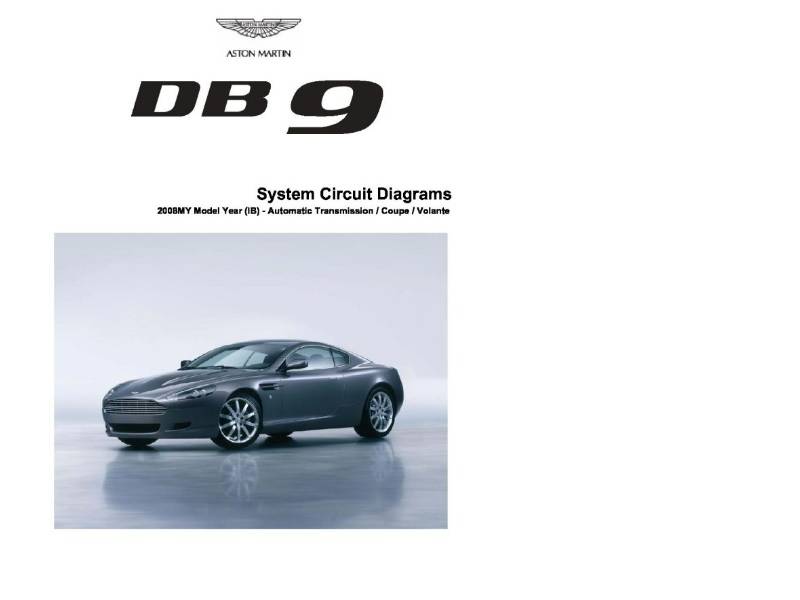
Aston Martin DB9 2008+ Wiring Diagrams

Posted on February 5, 2023August 11, 2025 by Paul

Aston Martin DB9 2008+ Wiring Diagrams

Front Accessory Socket / Cigar Lighter (Rear Power Outlet)

Active Restraint System

Active Restraint System

Air Conditioning

Air Conditioning

Air Conditioning

Antenna Amplifiers

Automatic Transmission

Automatic Transmission

Background Illumination

Background Illumination

CAN BUS2 (High Speed Volcano)

CAN BUS2 (High Speed Volcano)

CAN BUS1 (Powertrain + OBD Connector ‘Powertrain’)

CCM, ICM, GPS, Phone, MP, AUU

Convertible Roof

Convertible Roof

Cooling Fans

Doors (Driver & Passenger Door Lock)

Doors (Drivers Door Electric Windows)

Doors (Passenger Door Electric Windows)

Doors (Master Lock Switch)

Doors (Drivers Door Power Mirror)

Doors (Passenger Door Power Mirror)

Doors (Drivers Door Powerfold Mirror)

Doors (Passenger Door Powerfold Mirror)

Driver Information Module

Glove box & Fuel Flap Release Switch

Exterior Lighting (Side Lamps, Dip Beam, Main Beam)

Exterior Lighting (Headlamp Levelling ECU)

Exterior Lighting (Direction Indicators & Side Repeaters)

Exterior Lighting (License Plate Lamps & Boot Release)

Exterior Lighting (Rear Fog, Tail Lamps & Rev Switch (Manual))

Exterior Lighting (Stop Lamps & Handbrake)

Fuel System

HRW, PAS ECU, GDO

Engine (HEGO’s & CMS)

Engine (3 Pin Coils)

Engine (Injectors & Mass Air Flow Sensors)

Engine (Sensors)

Engine (Sensors)

Engine (Accelerator Pedal & Throttle Motors)

Audio System

Interior Illumination (Including Door Puddle Lamps)

ABS / IVD / DSC

MMM & MMD

OBD Connector ‘Body’

Parking Distance Aid

Power & Ground (CEM, Spanish Oak ECU’s)

Power Distribution

Seat (Drivers Memory Seat)

Seat (Passenger Memory Seat)

Recaro Seat

Security System

Starting & Charging (Charging)

Starting & Charging (Starting)

Steering Wheel Switches

Wash Wipe (Including Headlamp Wash)

MOST

Federal / Japanese Number Plate Link

Power Cables & Earth Braids

CEM (1 of 2)

CEM (2 of 2)

Rear Fusebox

Engine Bay / Underbonnet Fusebox

CCM Pinout, Spanish Oak ECU

Earths

Back to Aston Martin Manuals and Brochures

Share this...
  • Facebook
  • Pinterest
  • Email
  • Twitter
  • Whatsapp

5 thoughts on “Aston Martin DB9 2008+ Wiring Diagrams”

  1. clive turrell says:
    July 13, 2024 at 4:41 am

    Hi just purchased a 2008 DB9 Le Mans edition non runner previous owner removed engine wiring harness,bought used one installed it ended up with spare connector had no clue where it went,I have the old harness but need to know the destination of pin outs to check what goes where all illustrations I have found show the harness but no labels or explanation what goes where,can you help pulled out what little hair I had left trying to figure this puzzle out as have never owned or worked on Astons before,also immobiliser will not operate possibly related to the harness Thanks Clive

    Reply
  2. clive turrell says:
    July 13, 2024 at 8:43 pm

    Hi just purchased a 2008 DB9 Le Mans edition,non runner as original engine harness removed(fire damage)previous owner fitted new(used)harness from a Aston specialist,install harness only to find spare connector with nothing to connect it to,question would this stop the engine starting because engine will not fire and immobiliser is still on,hope to find engine harness that has been labelled but so far no luck,can find expoded views of the harness but nothing is tagged or labelled,could you push me in the right direction

    Reply
    1. Paul says:
      July 17, 2024 at 5:25 am

      Hi Clive,

      I can’t be or much help I’m afraid, I’ve been looking for a connector location diagram and never found one.

      What year is your new engine harness from, and can you describe the spare connector and its rough location.

      Paul

      Reply
      1. clive Turrell says:
        July 8, 2025 at 8:53 pm

        Hi Paul sorry for delay been in Hospital and in recovery,so far I can only find one connector spare looking from front of car into engine bat it is left hand side between washer filler and left hand cylinder bank will try and take picture it is a fairly short lead which means the male connector must be nearby,as you know quite a tight bay to be poking around,I have dash working everything apart from fan/blower and blank screens within the main instruments Thanks Clive As you guessed I have yet to try and fire up the beast as just finished assembling top of engine,plugs and injectors want to make sure everything works before pressing the dreaded start button!!!

        Reply
  3. Francis de Leeuw says:
    August 1, 2025 at 4:24 pm

    Hello again, I would like firstly to thank you for this very helpfull website. After fixing my exhaust system to be legal here in Switzerland by switching a white wire that controls the flap opening, I just followed your guidance on installing a switch for the rear windows on my DB9 Volante.

    I have one question about a pesky problem that I have: the “passenger door is open” message that pops up every 20 seconds while driving under 50km/h. Can this message be removed by switching a wire somewhere ? Would doing that affect anything else on the car?

    Thanks for your advice.

    Francis

    Reply

Leave a Reply Cancel reply

Your email address will not be published. Required fields are marked *

Recent Comments

  • Phil on Aston Martin 3 way switchable Exhaust Valve: “Bonjour Vap vélocité (Chris Edgett) m’a conjoncture une programmation moteur optimale 😆 Avec en plus, en mode normal : valves…” Aug 26, 08:18
  • Paul on Aston Martin Engine Plaque: “Emailed you. Paul” Aug 22, 06:14
  • Max Wren on Aston Martin Engine Plaque: “Hi mate, could I get one please. Let me know 👍🏻” Aug 21, 23:41
  • Paul on Evolution of my DB9S: “North Kent, UK” Aug 11, 06:07
  • rob kay on Evolution of my DB9S: “paul, where are you geographically ?” Aug 10, 22:16
©2022 DB9S.com